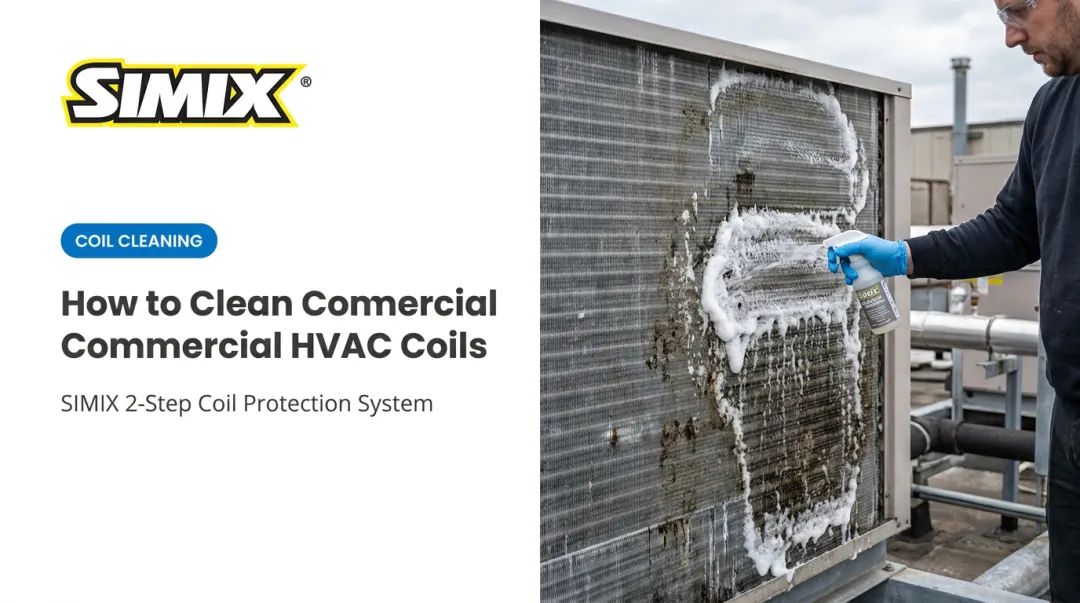
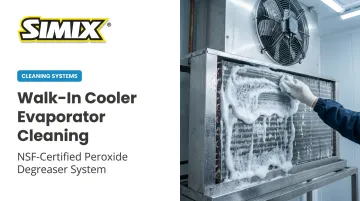
Introduction
Your walk-in cooler is running non-stop, but the temperature won't budge below 45°F. Ice is creeping across the fan blades. A case of produce in the back corner is starting to soften faster than it should. Sound familiar?
Nine times out of ten, the culprit is a neglected evaporator coil buried inside that fan unit on the ceiling.
Skip cleaning it long enough and you're looking at higher energy bills, a compressor working overtime, potential health code violations, and a repair bill that could've been avoided.
This guide covers why coil cleaning matters, where to find the coil, the warning signs it's overdue, a step-by-step cleaning process, and how often you should be doing this.
Key Takeaways
- Clean evaporator coils every 1-3 months depending on grease load and traffic
- Dirty coils force compressors to run longer, driving up energy costs and wear
- Frost, warm temps, or pooling water signal it's time to check the coil.
- Stick to NSF-certified, non-acidic cleaners built for HVAC/R coils
- Pairing cleaning with a ceramic coating stretches time between deep cleans.
Why Walk-In Cooler Evaporator Coil Cleaning Matters
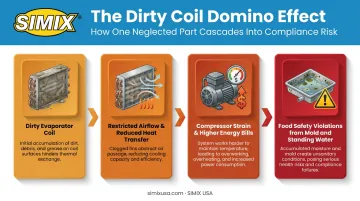
A walk-in cooler lives or dies by its ability to move heat off the coil. When grease vapor, dust, and biofilm build up on those aluminum fins, they act like a blanket, insulating the coil from the air it's supposed to be cooling.
The compressor doesn't know the coil is dirty. It just knows the setpoint hasn't been reached, so it keeps running. According to a 2024 ACHR News report, that dirt layer directly reduces coil efficiency, forcing the system to work harder for the same cooling output.
Restricted airflow doesn't just slow things down, it changes the physics of the whole refrigeration cycle. Dirt and frost lower suction pressure, which raises the compression ratio and cuts the compressor's volumetric efficiency. In severe cases, heavy icing can send liquid refrigerant back to the compressor, causing flooding or slugging that damages internal components (ACHR News, 2021).
Food Safety Isn't Optional
The mechanical strain isn't the only cost of a dirty coil. Health inspectors pay close attention to moisture control in walk-in units, and condensate pans stay wet almost constantly, making them prime real estate for mold and slime. Los Angeles County's retail food inspection guide flags several walk-in refrigeration issues as violations:
- Dust or lint buildup on the cooling unit or fan guards
- Standing water, slime, or mold in the condensate pan
- Pans that fail to drain properly
- Condensate dripping onto food, raw or ready-to-eat
Any one of these can trigger a citation during your next health inspection (Los Angeles County Department of Public Health, 2025).
Prevention Beats Repair
Between the mechanical strain and the citation risk, a dirty coil rarely fails quietly. It strains the compressor, spikes your utility bill, and eventually leads to an emergency service call, usually on a Friday night during dinner rush. Routine cleaning costs a fraction of what a compressor replacement or a failed health inspection does.
This is where a protective step after cleaning earns its keep. SIMIX's NSF-certified, ceramic-based coil treatment is applied after the coil is clean, creating a surface that resists grease and dust adhesion. That means less buildup between cleanings and steadier heat transfer performance over time.
Locating the Evaporator Coil and Recognizing When It Needs Cleaning
Where Is the Evaporator Coil in a Walk-In Cooler?
The evaporator coil lives inside the fan coil unit, usually mounted flush against the ceiling or high on an interior wall of the walk-in. This is separate from the condenser, which sits outside or on the roof.
Getting to the coil typically means removing a front access panel on the unit cooler. A few things to keep in mind:
- Shut off power at the breaker before opening the panel. The coil and fan sit close together, and you don't want blades spinning while your hands are inside.
- Mount units level and secure them with rod hangers, lag screws, or bolts so condensate drains properly.
- Avoid placing tools or hands near sharp fin edges. They're thinner than they look.
Signs Your Walk-In Cooler Evaporator Coil Needs Cleaning
Look for these red flags during routine checks:
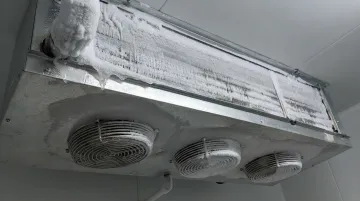
- Ice or heavy frost on the coil fins or fan blades — restricts airflow and signals reduced heat exchange
- Cooler struggling to hold temperature despite the compressor running longer than usual
- Water pooling on the floor or the condensate pan overflowing, often from a drain line clogged with debris
- Visible slime, mold, or a musty smell around the coil or drain pan
A quick caveat: a warm cooler isn't automatic proof of a dirty coil. Low refrigerant charge, high superheat, or door seal issues can cause the same symptom. If cleaning doesn't resolve it, call a technician.
How to Clean a Walk-In Cooler Evaporator Coil
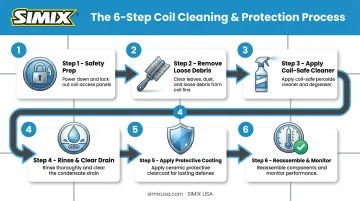
Safety Prep First
Before touching anything:
- Turn off power at the breaker, not just the unit switch
- Let any existing ice or frost fully defrost. Don't chip at it.
- Make sure you have adequate lighting to see the fins clearly
Remove Loose Debris
Start with a soft brush or a vacuum fitted with a bristle attachment. Aluminum fins bend easily, so avoid stiff brushes, screwdrivers, or anything metal that could crush them. This step alone often clears a surprising amount of dust and grease film.
Apply a Coil-Safe Cleaner
This is where product choice matters most. Manufacturer guidance is consistent on one point: never use an acid-based cleaner on coil fins. Acids corrode aluminum and can shorten the coil's life dramatically (Heatcraft, 2020).
Instead, look for an NSF-certified, non-corrosive foaming cleaner designed for HVAC/R coils. SIMIX's Multi-Surface Peroxide Cleaner & Degreaser is one option built around this idea, a zero-VOC, peroxide-based formula that cuts through grease and biofilm without the harsh chemistry that eats away at metal. Apply it per label instructions and let it dwell long enough to break down buildup before rinsing.
Rinse, Clear the Drain, and Dry
Rinse all cleaner residue thoroughly. Then turn attention to the condensate drain line and pan:
- Clear any debris blocking the line
- Check that the pan drains freely, not just that it looks empty
- Treat the pan to discourage microbial regrowth
- Let everything dry fully before closing the unit back up
Consider a Protective Coating
Once the coil is clean and dry, applying a ceramic coil treatment adds a layer that resists future grease and dust adhesion. SIMIX's Multi-Surface Ceramic Clearcoat is built for this exact application, pairing with the peroxide cleaner as a two-step system.
In practice, this means the next cleaning cycle takes less time and can happen less often, since contaminants have a harder time sticking to the treated surface.
Reassemble and Monitor
Replace the cover, restore power, and watch the cooler over the next few hours. Confirm it's pulling back down to setpoint at a normal rate. If it's still struggling after a proper cleaning, that points to a mechanical issue rather than a dirty coil.
Walk-In Cooler Evaporator Cleaning Schedule
There's no single number that fits every kitchen. Several factors shift how fast a coil gets dirty:
- Grease load from nearby cooking equipment
- Door traffic and how often the cooler opens
- Ambient humidity in the kitchen environment Use this table as a starting point, then adjust based on what you actually see when you open the panel.
| Frequency | Task |
|---|---|
| Daily/Weekly | Visual check for frost, unusual noise, or water pooling |
| Monthly | Inspect coil and drain pan for buildup; clean if grease or dust is visible |
| Quarterly | Full coil cleaning cycle for standard commercial kitchens |
| Annually | Professional inspection, deep clean, refrigerant and fan check |
High-grease environments like fry stations and grills often need monthly coil cleaning, since airborne grease settles on the fins faster than in a typical kitchen. An NSF-certified degreaser built for food-contact surfaces cuts through this buildup without damaging the fins.
Low-traffic storage coolers, by contrast, may only need attention once a quarter. Match the cleaning frequency to what's actually building up on the coil, not a fixed calendar.
Conclusion
Evaporator coil cleaning isn't a task you can push to next month's to-do list. It's directly tied to food safety, energy costs, and how long your compressor lasts before failing early.
A documented cleaning schedule, paired with a protective ceramic coating like SIMIX's Clearcoat after each deep clean, strikes a good balance between labor cost and long-term reliability. Consistent coil care means fewer emergency repair calls and up to 40% lower maintenance costs over the life of the equipment. That's a trade worth making.
Frequently Asked Questions
How often does the evaporator coil on a walk-in cooler need to be cleaned?
Most commercial walk-in coolers need coil cleaning every 1-3 months. High-grease kitchens with fry stations or grills often need monthly attention, while low-traffic storage coolers can go longer.
Where is the evaporator coil on a walk-in cooler?
It sits inside the fan coil unit mounted on the ceiling or upper wall inside the cooler, behind a removable access panel. This is separate from the condenser, which is located outside or on the roof.
Can I clean the evaporator coil myself, or do I need a professional?
Basic visual checks and light cleaning, like removing loose debris and applying an approved coil cleaner, can be done in-house. Full disassembly, refrigerant-adjacent work, or persistent icing should go to a licensed HVAC/R technician.
What cleaning products are safe for walk-in cooler evaporator coils in food service environments?
Stick to NSF-certified, non-corrosive coil cleaners rather than acid-based products, which can corrode aluminum fins and pose food-contact risks. SIMIX's NSF-certified peroxide-based cleaner is formulated for this exact application. Always follow the label's dilution and dwell time instructions.
What happens if I don't clean the evaporator coil regularly?
Expect reduced cooling performance, higher energy bills, and increased risk of health code violations from mold or standing water in the condensate pan. Over time, restricted airflow strains the compressor and can lead to premature failure.
How do I know if frost or ice buildup on the coil means I need cleaning or repair?
Light frost caused by dirt or blocked airflow usually clears up once you clean the coil. Persistent, heavy icing that returns quickly often points to a refrigerant issue or a defrost cycle problem that needs a technician.